 (Bolts created and placed within the nuts)
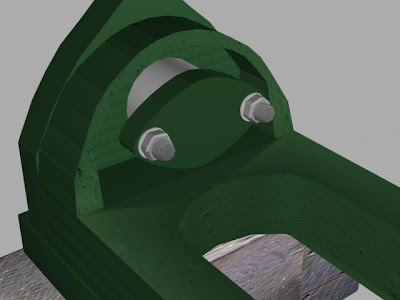
(Nuts and bolts cloned onto the end base plate)
Now that the nuts and bolts are created, I decided to clone them for the end base plate. So, I selected the bolt, washer and one of the nuts and right clicked. Selecting the clone tool and choosing 'copy', I then created a copy of the objects. I then rotated them and dragged them onto the end base plate. As the nut, bolt and washer were a little small, I selected them all and scaled them to make them slightly larger. This then gave me an exact representation of my original source photo.


(Capsule created and modified)
I decided to create the object as shown above. It will become clear in the next stage why I decided to make this. So, first I used the 'capsule' tool to create a standard horizontal capsule. I then converted this to an editable poly and selected the vertices option. Highlighting the two middle vertical rows of vertices, I then dragged them in towards each other using the scale tool, then used the move tool to place them slightly higher. This then left me with this 'jelly bean' shape.

(Cylinder after the boolean tool)
As can be seen from the image above, I first created a chamfer cylinder. Cloning the 'jelly bean' shape that I created in the last stage, I then positioned them in the correct place where they have now removed a chunk out of the cylinder. I then selected the cylinder, and used the Boolean tool, choosing one of the 'jelly bean' shapes as the operand B. I repeated this process, which then left me with two sections missing, which are in the shape of a jelly bean.
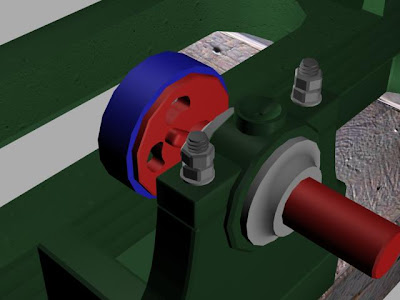
(Tube created around the cylinder)
I have now started the creation of the first object that will be animated. This is the moving arm at the front of the pump. Creating a standard tube around the cylinder that I created has enabled me to continue with the rest of the front arm, which I shall do so within the next section.

No comments:
Post a Comment